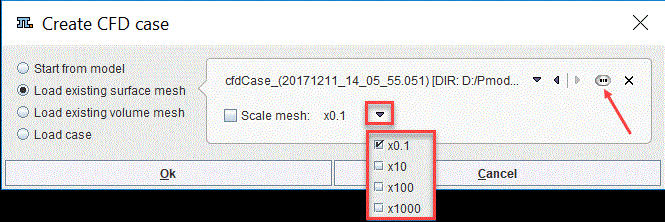
Start the CFD simulation activating the Create CFD case green button. A dialog window appears as illustrated below:

Toggle the Load existing surface mesh radio button to start the creation of the CFD case from a SM. Use the open ![]() button to load a SM file. To scale the SM enable the Scale mesh box and select one of the scaling size available on the list.
button to load a SM file. To scale the SM enable the Scale mesh box and select one of the scaling size available on the list.
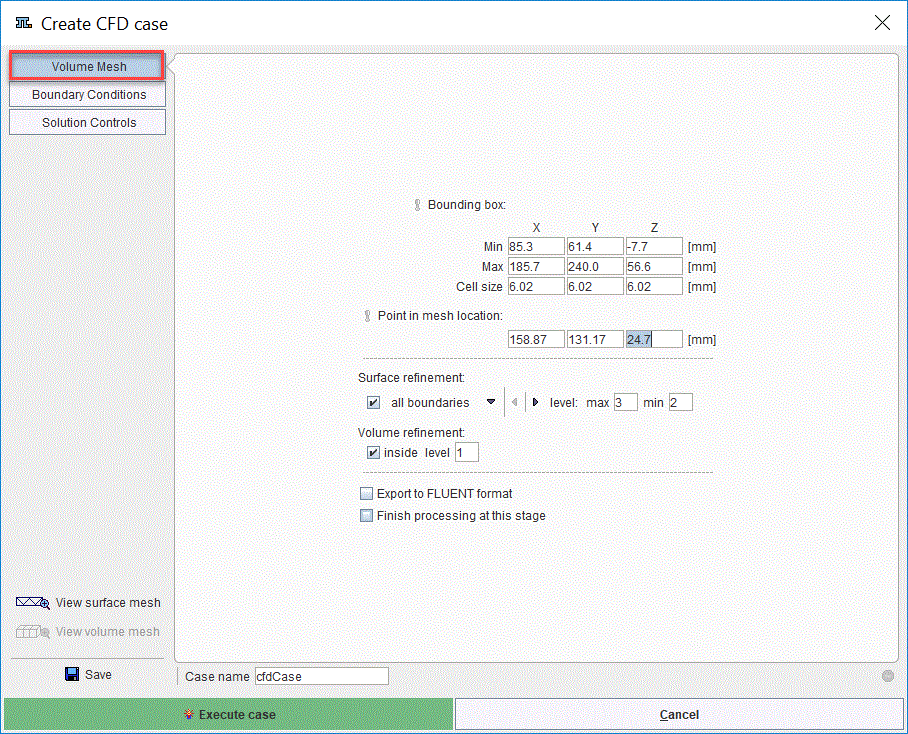
Close the dialog window with the OK button to continue the creation of the CFD case. The CFD interface appears displaying the Volume Mesh as the first step of the analysis.

The View surface mesh button allows exploring interactively the loaded surface mesh in the 3D interface.
The Bounding box and the Point in mesh location parameters are initially set to 0 and 1 respectively. It is mandatory for the user to know these parameters and interactively type them in the dedicated text boxes.
The Surface refinement parameters are set to all boundaries to a max level of 3 and a min level of 2. This indicates that a maximum number of 3 divisions will be applied to the curved parts of the surface while a minimum number of 2 divisions anywhere else in the neighbourhood.
The Volume refinement is set to a level of 2. This indicates that each cell in the volume mesh will be divided in two.
Continue with the definition of the Boundary Conditions as explained previously.
Finally, define the parameters for the solver. Set the number of iterations to a full tens number, e.g. 100 and enable the write the final result only radio button to save only the final solution for the simulation. Enable Calculate wall shear stress box for WSS calculation.
Note: Assign a meaningful name to the CFD case in the Case name field. This facilitates the management of the OpenFoam remote and local cases.
Activate the Execute case button to send the CFD case to the OpenFoam interface