VOI List
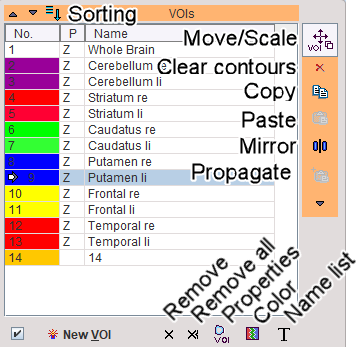
The VOIs section on the List tab contains the list of defined contour VOIs, and VOIs which are in the progress of outlining.
VOI Properties
VOI properties can be set while creating a New VOI if the Open properties check box is enabled:
![]()
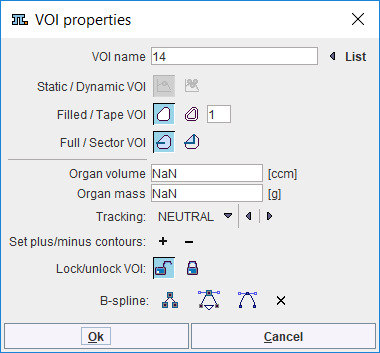
or can be changed using the ![]() button. It shows the VOI properties dialog window illustrated below.
button. It shows the VOI properties dialog window illustrated below.
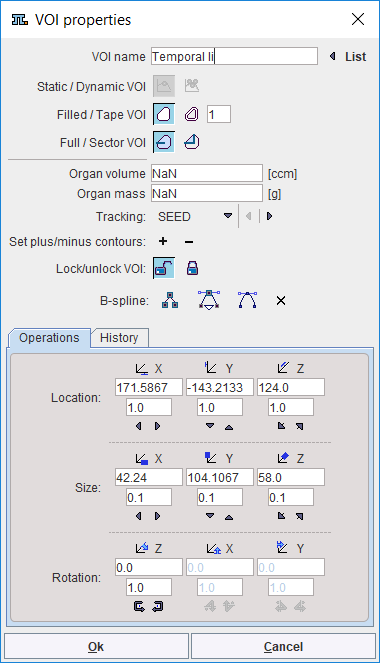
The window allows changing the properties and immediately updates the display for providing a visual feedback. The property elements have the following meaning:
VOI name |
Allows assigning a name to the VOI in the list either interactively or from predefined name lists. The List button allows using pre-defined names stored in name lists and is described below. |
Static/Dynamic |
This property is only relevant for dynamic series. If a VOI is defined static |
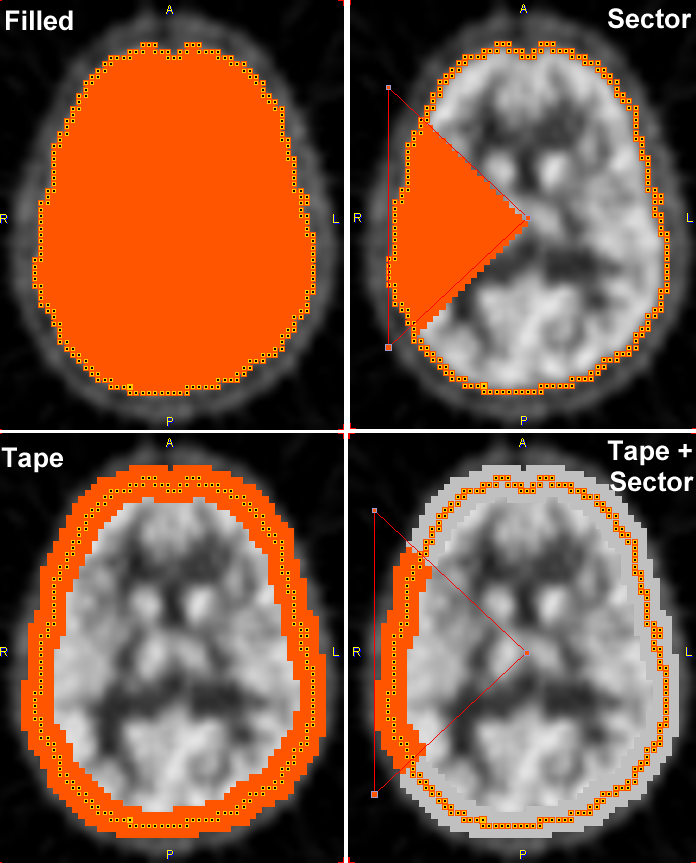
Filled/Tape |
Filled VOI Tape VOI |
Full/Sector |
Full VOI Sector VOI |
Organ volume |
|
Tracking |
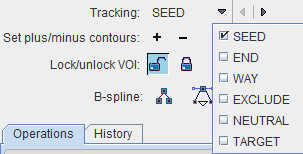
Allows defining the role the VOI would have in a module which calculates tracks such as PGEM.
The role of VOIs in tractography: •SEED: Tractography is started from the pixels in the seed VOIs, following the local vector directions. •END: Only tracks ending in this VOI will be used. To avoid excessive pruning of tracks, an END VOI should have sufficient volume. •WAY: Only tracks passing through the WAY VOI will be used. •EXCLUDE: Tracks passing through an EXCLUDE VOI will be removed. •NEUTRAL: Such VOIs have no impact on tractography. Setting VOIs to NEUTRAL allows assessing the effect of END, WAY and EXCLUDE VOIs without the need of removing them. |
Set plus/minus |
The + and - buttons set all contours of the VOI to positive and negative, respectively, see ROI and Contour Level Properties. The main purpose of - is to remove parts of an enclosing VOI. This is done by merging the enclosing (positive) VOI with the enclosed (negative) VOI. |
Lock/unlock |
Unlocked |
B-spline |
The action buttons allow converting a polygon into a curved b-spline contour, and reverse. |
Location |
X, Y and Z position of the VOI relative to the origin in [mm]. The location can be changed by entering new coordinates or using the incrementing arrow buttons. |
Size |
Size of the VOI bounding box in mm. The sizes can be changed and result in a proportional scaling in the corresponding direction. The sizes can be edited or incremented by the arrow buttons. Note that for contour VOIs consisting of planar ROIs the scaling is only supported within the ROI planes, not orthogonal to it. Object VOIs can be scaled in all directions. |
Rotation |
The VOI can be rotated in space. Note that for contour VOIs consisting of planar ROIs rotation is only supported around the axis orthogonal to the ROI plane. Object VOIs can be rotated around all directions. The angles can be numerically specified in degrees, or incremented using the arrow buttons. |
The illustration below illustrates the effect of the different properties on the pixels used for VOI statistics.
Color Definition
Colors are randomly assigned to created VOIs. To change the color, the VOI in the VOIs list, then activate the palette button ![]() and change the color. Note that all contours belonging to a VOI have the same color.
and change the color. Note that all contours belonging to a VOI have the same color.
Use of Name List
For consistent VOI naming, the use of name lists is recommended. To use list naming, please select the VOI in the VOIs list, then activate ![]() . It opens the dialog window illustrated below.
. It opens the dialog window illustrated below.
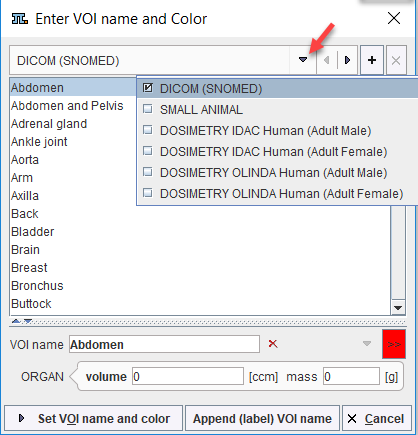
Six lists with pre-defined organ names are available: DICOM, SMALL ANIMAL, and four DOSIMETRY variants. Select the appropriate one in the list selection in the upper left and proceed as follows:
1.Select an organ name from the selected list.
Note: In the SMALL ANIMAL list, organs with trailing >> such as Tumor>> offer a substructure list. Other organs like the Kidneys offer a Laterality choice. Select as appropriate.
1.The VOI name shown in the text entry field is composed from the selections, but can be edited or completely redefined.
CAUTION: An existing VOI with exactly the same name will be overwritten. In this case please add a suffix to differentiate (e.g. CerebellumLeft in the example above)
2.The ORGAN volume and mass are relevant for dosimetry studies. There are predefined values for DOSIMETRY selection lists. These values can be edited if necessary for any selection.
3.Change the VOI color.
4.The Set VOI name and color button replaces the current VOI name, whereas Append (label) VOI name appends the string to it.
Custom VOI List
To create a custom VOI list please populate the VOIs list with a set of VOIs using the proper names. Select any of the VOIs and open the VOI properties dialog window. Activate List and in the appearing dialog the + button, to define the name of the new list.
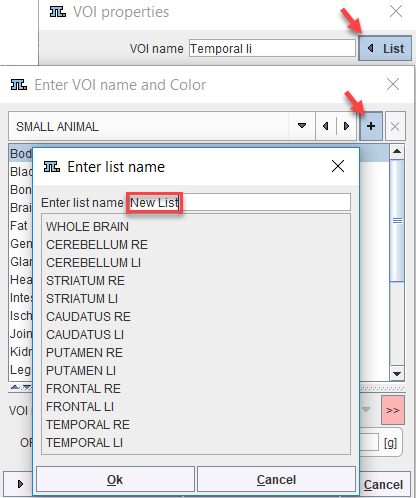
From then on, this list can be used alternatively to the pre-defined lists.
